YukkuriMovieMaker4 (YMM4) is a free Japanese video editor for making “Yukkuri” videos — the commentary and explainer videos where two round-headed characters, Yukkuri Reimu and Yukkuri Marisa, talk to each other in a synthesized voice. I reinstalled the latest version, so this guide walks through everything in the order I actually did it: downloading YMM4, making a character speak, and getting the character art (tachie) to move its mouth and blink.
YMM4 is only distributed in Japanese, and this guide uses the Japanese interface. Whenever a menu or button comes up, I show the Japanese label as it appears on screen, followed by an English translation — for example, 「ファイル」 (File).
This guide reflects YMM4 as of November 2026. YMM4 is updated often, so please also check the official site, “Manjuzukai no Omochabako” (Japanese), for the latest details.
[ Reference ] My setup
| Item | Details |
|---|---|
| YMM4 | v4.56.1.1 (September 10, 2026) |
| OS | Windows 11 |
| Voice | AquesTalk (the “Yukkuri voice” bundled with YMM4; Reimu uses 女性1 “Female 1” and Marisa uses 女性2 “Female 2”) |
| Character art | Yukkuri Reimu and Yukkuri Marisa (the classic Yukkuri duo) |
Downloading and installing YMM4
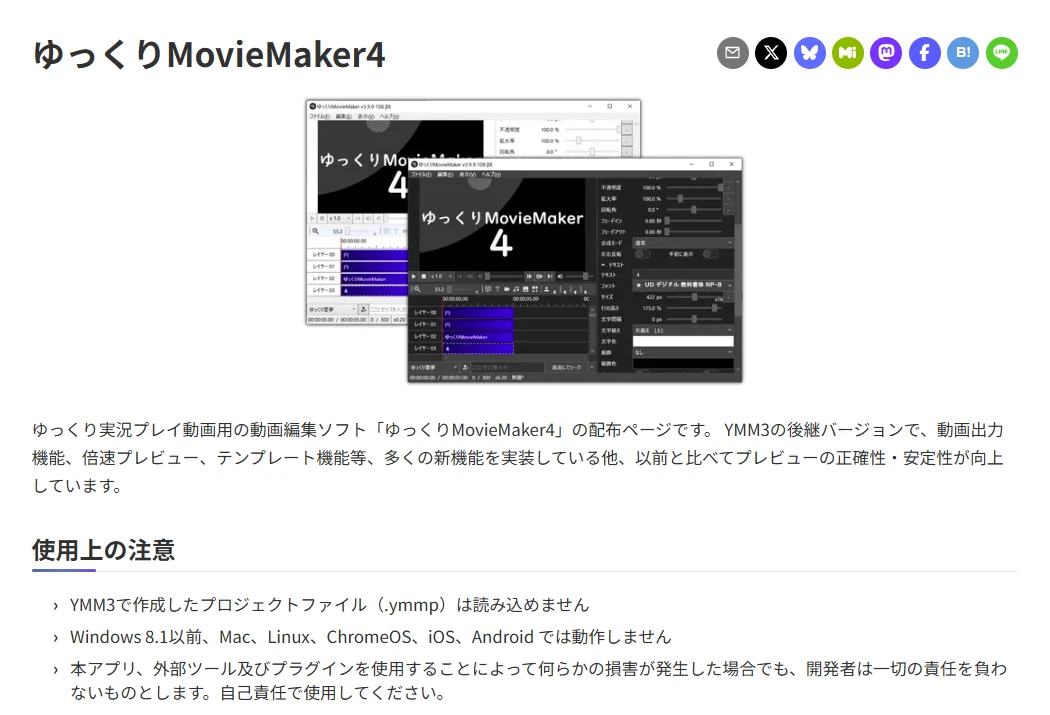
YMM4 is distributed on “Manjuzukai no Omochabako” (Japanese), the official site of its developer, Manjuzukai. There is no installer: you download a zip file and extract it. YMM4 runs on Windows 10 and later. It does not run on macOS, Linux, or Windows 8.1 and earlier.
YMM4 or YMM4 Lite?
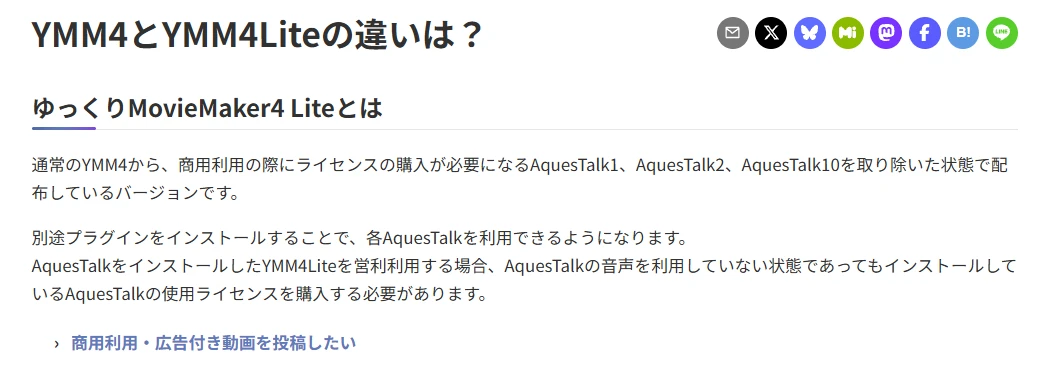
The official site offers two editions: YukkuriMovieMaker4 and YukkuriMovieMaker4 Lite. The only difference is whether AquesTalk — the speech synthesis library behind the “Yukkuri voice” — is included.
| YMM4 | YMM4 Lite | |
|---|---|---|
| AquesTalk (Yukkuri voice) | Included | Not included (can be added later with a plugin) |
| Personal, non-commercial use | Free | Free |
| Commercial use (e.g. monetized videos) | Requires an AquesTalk license | Not required, as long as you don’t add AquesTalk |
A simple rule of thumb: choose YMM4 if you want the Yukkuri voice, and YMM4 Lite if you only plan to use other voices such as VOICEVOX. License terms can change, so if you plan to use YMM4 commercially, be sure to read the official FAQ, “What is the difference between YMM4 and YMM4 Lite?” (Japanese). I wanted the Yukkuri voice, so I installed the regular YMM4 (not Lite).
Download the zip file
Scroll down the official site to the 「ダウンロード」 (Download) section, where you’ll find buttons for YMM4 and YMM4 Lite. Click the one you chose to download the zip file.
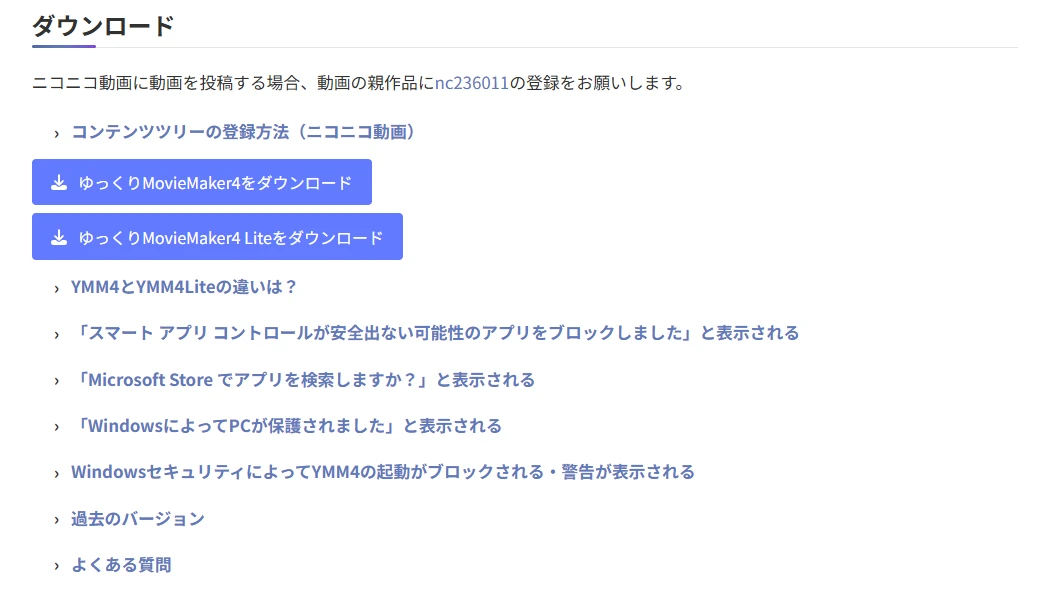
If you post your videos on Niconico (a Japanese video site), the official site asks you to register YMM4 (nc236011) as a “parent work” of your video.
Extract and launch
- Right-click the downloaded zip file and choose “Extract All”
- Move the extracted folder anywhere you like (I used
C:\Tools\video\YukkuriMovieMaker_v4, but any location works) - Run
YukkuriMovieMaker.exeinside the folder
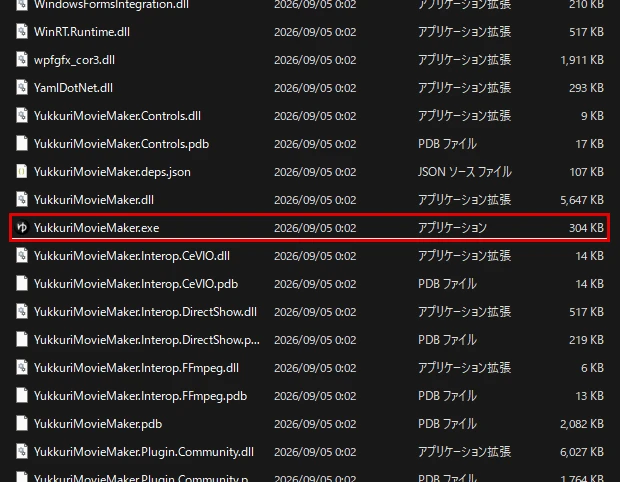
In my case, Windows didn’t show any warnings (such as SmartScreen). On some systems the app may be blocked from starting; the FAQ below the download buttons on the official site explains what to do.
Screens you’ll see on first launch
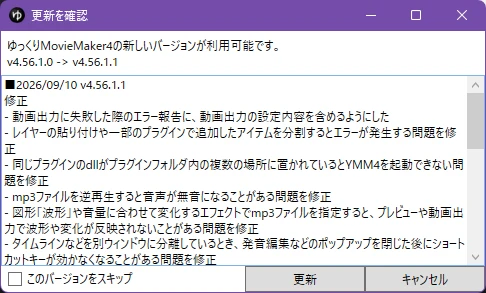
The first thing that appeared was an update check window. It seems to tell you when a newer version than the zip you downloaded is available — in my case, an update from v4.56.1.0 to v4.56.1.1. Click 「更新」 (Update) and YMM4 updates itself to the latest version.
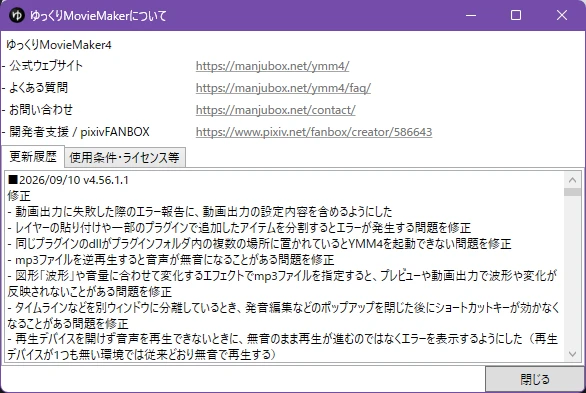
After the update, the 「ゆっくりMovieMakerについて」 (About YukkuriMovieMaker) window opens with the release notes. Close it with 「閉じる」 (Close) when you’re done.
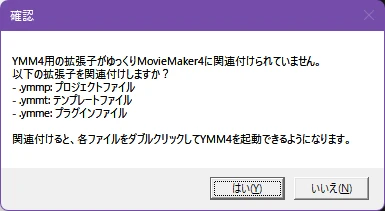
Next, YMM4 asks whether to associate its file extensions with the app. Choosing 「はい」 (Yes) lets you open project files (.ymmp) and other YMM4 files by double-clicking them, so I chose Yes.
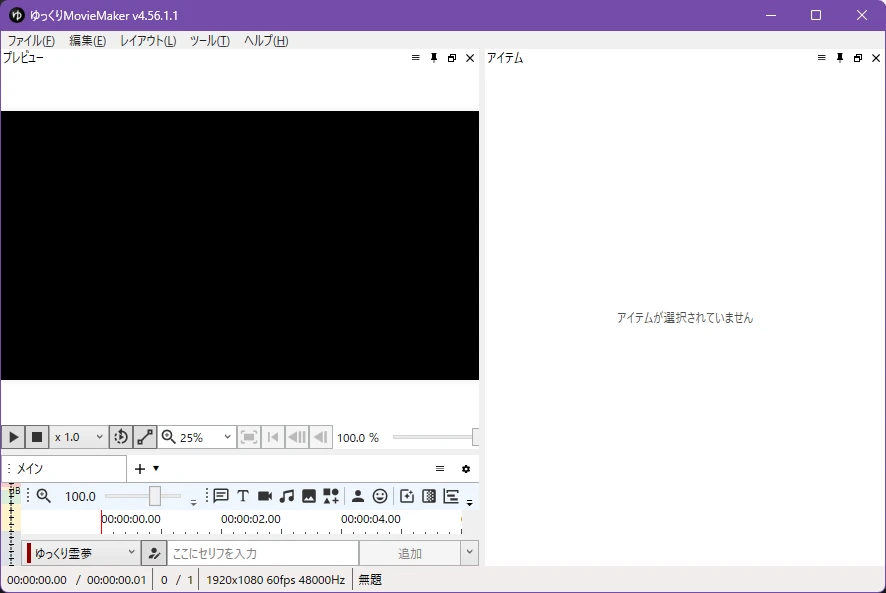
Now the YMM4 editor opens. The preview is at the top left, the settings for the selected item are on the right, and the timeline is at the bottom left. Below the timeline is the input box where you type your characters’ lines.
That’s it for installation. To uninstall, simply delete the folder.
What YMM4 can do
YMM4 is a free video editor developed by Manjuzukai. Just type a line of dialogue, and a speech synthesizer reads it aloud while YMM4 adds subtitles and makes the character’s mouth move. That makes it easy to create “Yukkuri” let’s-play and explainer videos, a popular genre in Japan.
- Voices: besides the Yukkuri voice (AquesTalk), it supports many speech synthesizers, including VOICEVOX, COEIROINK, A.I.VOICE, and VOICEPEAK
- Character art: you can place characters that move their mouths and blink in sync with their lines
- Editing: it also works as a regular video editor, with video, images, audio, and text on a timeline
- Plugins: many plugins and external tools are available to add features
Note that project files (.ymmp) made with the previous version, YMM3, cannot be opened in YMM4.
Settings to check first
Video settings (resolution and frame rate)
A new project starts at 1920×1080, 60 fps, and 48,000 Hz (shown at the very bottom of the window).
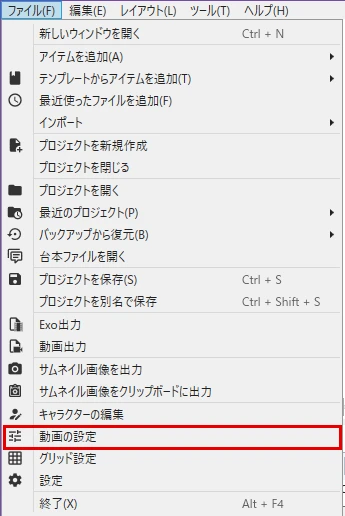
To change them, open 「ファイル」 (File) → 「動画の設定」 (Video Settings) from the menu.
Here you can change the resolution, frame rate, audio sampling rate, and background color. The available options are:
- Resolution: 3840×2160 (4K), 2560×1440, 1920×1080 (Full HD), 1280×720, 854×480, 640×360, or custom
- Frame rate: 1 fps to 144 fps (60, 30, and 24 fps are marked as recommended for Niconico)
- Audio sampling rate: 48,000 Hz or 44,100 Hz
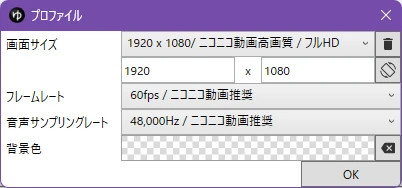
I was uploading to YouTube, so I kept the defaults: 1920×1080, 60 fps, 48,000 Hz.
YMM4 settings
I left YMM4’s own settings (「ファイル」 (File) → 「設定」 (Settings)) untouched. The only thing I configured was the character art, which I cover below.
Older versions of YMM4 couldn’t export videos by themselves, so you had to pass the project to AviUtl (another free Japanese video editor) to export it. I expected to need that setup again, but the current YMM4 exports on its own, so I skipped it.
If something doesn’t work right, check the official FAQ (Japanese). It covers problems you can fix in the settings, such as the space bar not starting playback or the preview freezing.
Making a character speak
At the bottom left of the editor there is a character drop-down (set to ゆっくり霊夢 “Yukkuri Reimu” at first) and a text box for dialogue. Type a line — I used 「ゆっくりしていってね」 (“Take it easy!”, the classic Yukkuri greeting) — and click 「追加」 (Add) on the right.

The line is added to the timeline as a dialogue item, and a subtitle appears in the preview. The item settings on the right show the line together with its pronunciation (reading), which you can edit there if the voice reads it wrong.
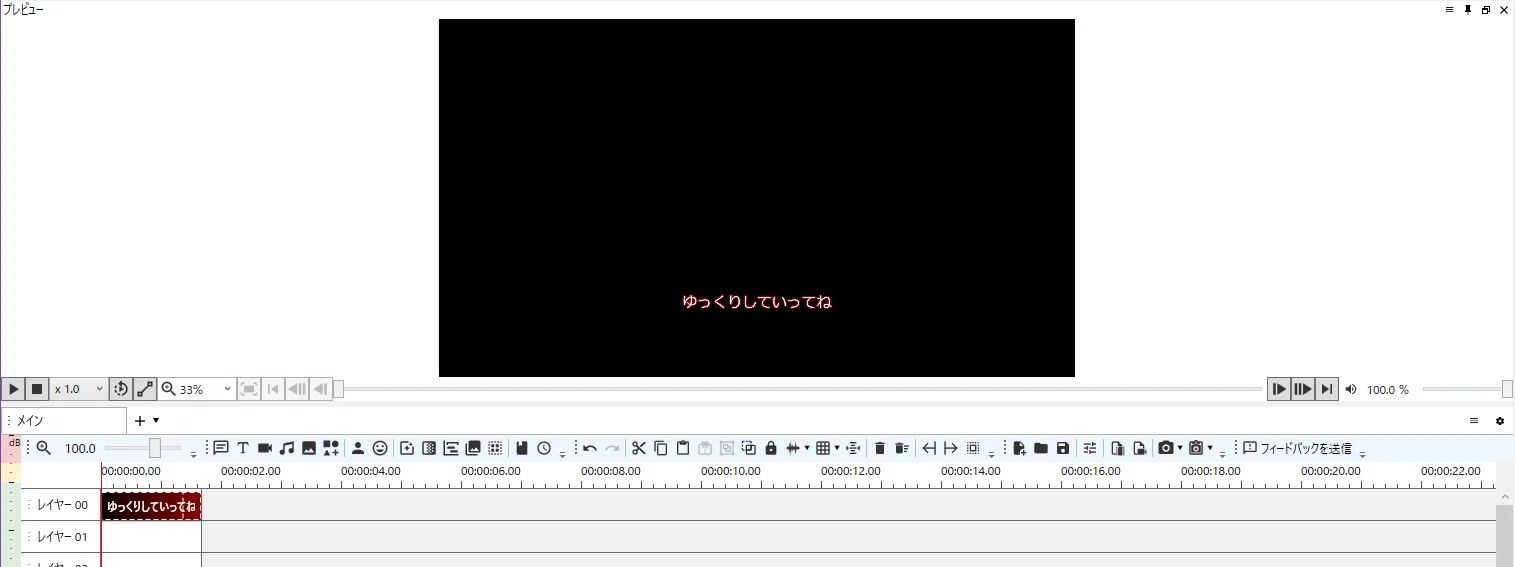
Press play (the space bar or the play button below the preview), and the line is read aloud in the Yukkuri voice.
A note for non-Japanese speakers: AquesTalk is a Japanese speech engine, so it expects Japanese text. To make characters speak English, use a voice that supports English instead.
Displaying character art (tachie)
You can make a video with dialogue alone, but a Yukkuri video isn’t really complete without the characters on screen. In YMM4, this character art is called 立ち絵 (tachie, “standing picture”). As in my older articles, I used Yukkuri Reimu and Yukkuri Marisa.
Types of character art and the official manual
YMM4 supports three types of character art, depending on the format of the asset. The official manual explains the setup steps in detail, so here I only describe what I actually tried. Please refer to the manual for the type that matches your assets.
| Type | Assets | Official manual (Japanese) |
|---|---|---|
| シンプル立ち絵 (Simple character art) | A single image (such as a transparent PNG). Prepare a closed-mouth and an open-mouth version, and the mouth opens as the character speaks. | Setting up simple character art / Creating simple character art assets |
| 動く立ち絵 (Animated character art) | Assets split into parts such as eyebrows, eyes, mouth, and body | Setting up animated character art |
| PSDファイル (PSD file) | A layered PSD file used as is. Lip-sync and blinking are set up in the 「Psd立ち絵素材マネージャー」 (PSD Character Art Manager). | Using a PSD file as character art |
Whichever type you use, placing the character and changing expressions works the same way, as described in How to use the character art feature (Japanese).
This time, I set up the round “manju”-style Yukkuri Reimu and Yukkuri Marisa as animated character art.
Getting the character art assets
Character art is not bundled with YMM4; you download assets that creators share online. Yukkuri Reimu and Marisa assets are available from sites such as the following (all in Japanese):
- Kitsune (Kari)’s Ci-en page (“Kitsune Yukkuri”). The assets are on these download pages:
- nicotalk & Character Asset Distribution (Yukkuri character assets)
Every asset comes with its creator’s terms of use, which set limits such as whether commercial use is allowed. Yukkuri characters are fan works based on the Touhou Project, so you also need to follow the original work’s guidelines. Always read the terms before using any assets.
I used 「ゆっくりキャラ素材・改」 (“Yukkuri Character Assets Kai”) from nicotalk & Character Asset Distribution — specifically 「ゆっくり霊夢改」 (Yukkuri Reimu Kai) and 「ゆっくり魔理沙改」 (Yukkuri Marisa Kai), created by Korobon.
Extracting the Yukkuri Reimu Kai zip gave me five folders: 顔 (face), 口 (mouth), 他 (other), 体 (body), and 目 (eyes).
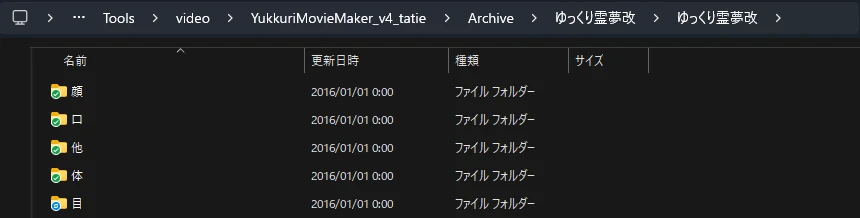
I put each character’s extracted folder into one folder for all my character art. In my case, the Yukkuri Reimu and Yukkuri Marisa folders sit side by side in C:\Tools\video\YukkuriMovieMaker_v4_tatie.
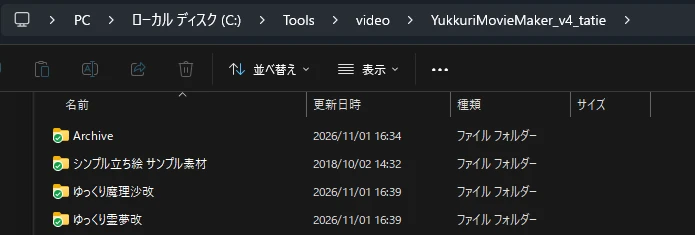
Converting the assets to YMM4’s animated character art format
The assets I used were in the format long used by nicotalk and YMM3 (often called the “Kitsune format”). YMM4’s animated character art uses different folder and file naming rules, so as is, the blinking and lip-sync frames play in the wrong order.
So I left the images themselves untouched and only renamed the folders and files to match YMM4’s rules. YMM4’s rules are described in the official guide Creating animated character art assets (Japanese).
Important: YMM4 recognizes the parts by their Japanese folder names, so the folder names must be written exactly in Japanese, as shown in the table below. The English in parentheses is only there to explain what each folder is.
| What to change | Original assets (Kitsune format) | YMM4 animated character art |
|---|---|---|
| Folder for blush and similar parts | 顔 (face) | Rename it to 顔色 (complexion) |
| Missing folders | None | Create empty 眉 (eyebrows), 髪 (hair), and 後 (back) folders (for Marisa, also 他 (other)) |
| Eyes (blinking) | 00.png = open → 00a.png … → last file = closed | 00.0.png = closed, 00.1.png and up = in-between (higher numbers are closer to open), 00.png = open |
| Mouth (lip-sync) | 00.png = closed → 00a.png … → last file = open | 00.0.png = closed, 00.1.png and up = in-between, 00.png = open |
The easy mistake to make is that the original assets order the eyes and the mouth in opposite directions: for the eyes, 00.png is “open,” but for the mouth, 00.png is “closed.” Before renaming, open the images and check the order from closed to open.
Also note that only the 00 eyes and mouth blink and lip-sync. Eyes and mouths from 01.png onward can be used as static expression variations.
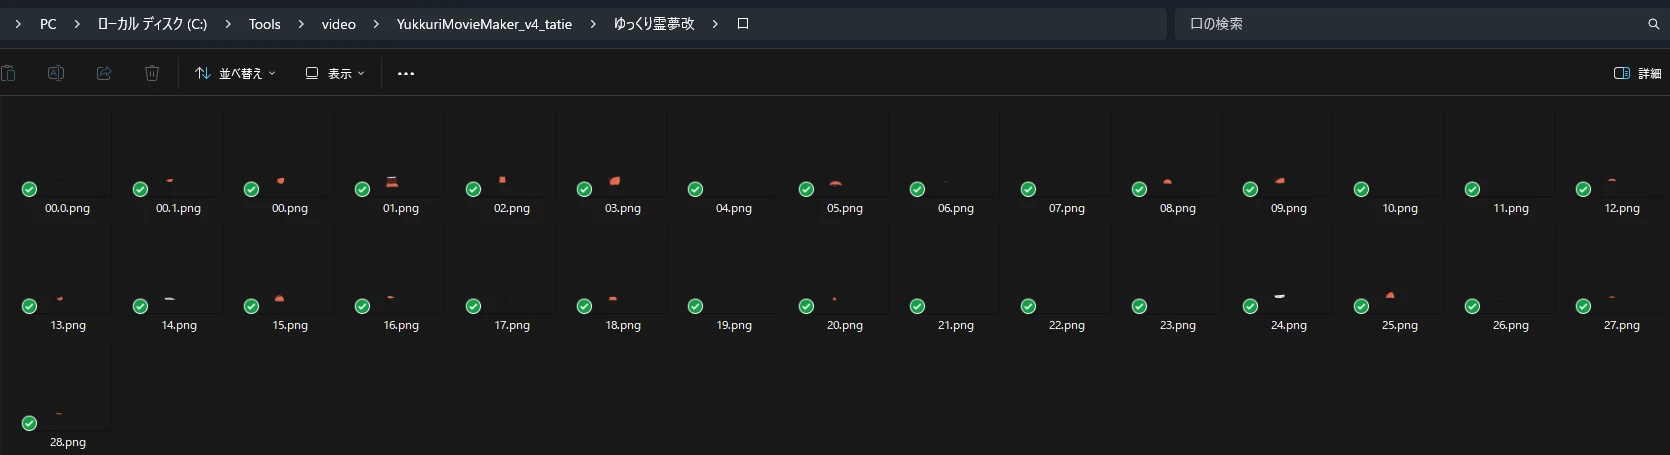
00.0.png (closed), 00.1.png (in-between), and 00.png (open) are used for lip-sync.After the changes, each character’s folder contains a full set of part folders, like this:
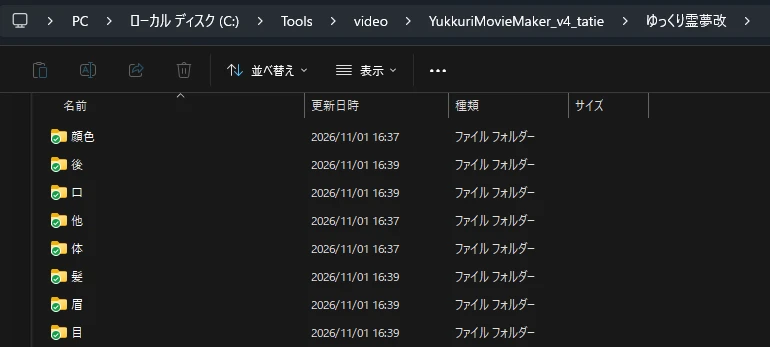
If something goes wrong, delete that character’s folder and extract the zip again to start over. It’s handy to keep the zip files in a separate folder (I use one called Archive).
Assigning the character art to a character
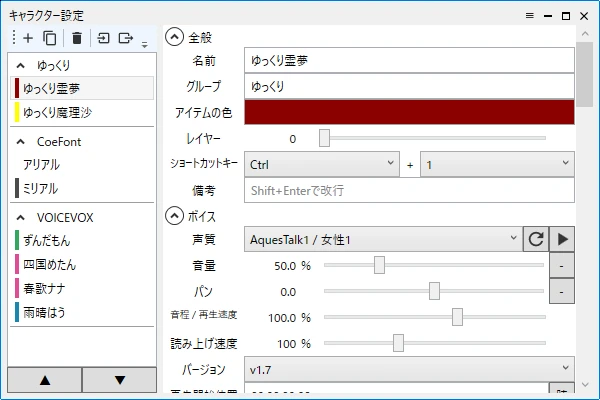
At the bottom left of the editor, click the button to the right of the character drop-down to open 「キャラクター設定」 (Character Settings).

Select a character in the list on the left (here, ゆっくり霊夢 “Yukkuri Reimu”), and its name, voice, and other settings appear on the right.
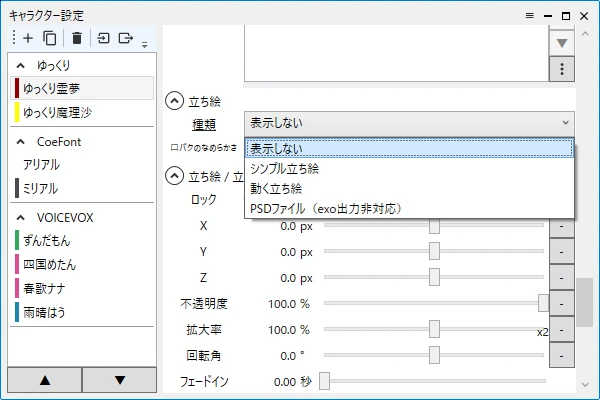
Scroll down on the right to the 「立ち絵」 (Character Art) section. The type is set to 「表示しない」 (Don’t show) by default, so change it to 「動く立ち絵」 (Animated character art).
A 「素材の場所」 (Asset location) field appears. Use its folder button to select the character folder you converted earlier (ゆっくり霊夢改). Once it’s set, the blinking and lip-sync settings appear as well.
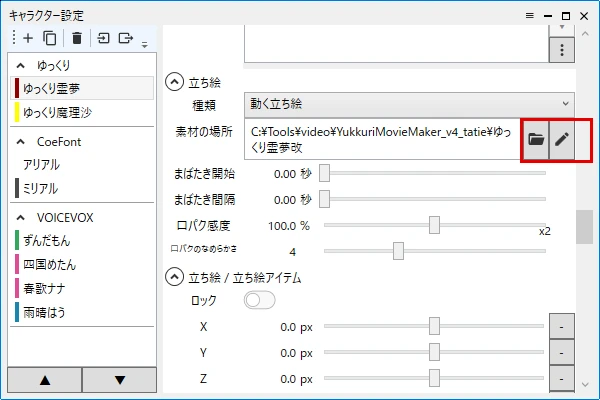
To check that the assets loaded correctly, click the pencil button to the right of the asset location to open the 「動く立ち絵素材マネージャー」 (Animated Character Art Manager). It lists each part; for example, eye 00 showed up as “00 (4),” meaning its four blinking frames were recognized as one set. On the right, the images are shown in animation order (closed → open).
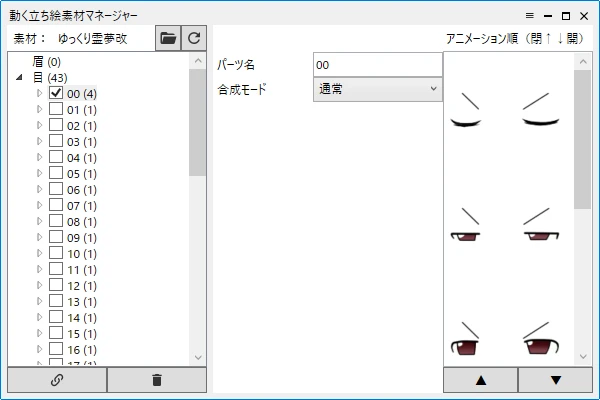
Set up Yukkuri Marisa the same way, pointing it to the ゆっくり魔理沙改 folder.
Placing the character and playing it back
Back in the editor, click the person-shaped button (character art item) on the toolbar above the timeline to add a character art item.

Select the new character art item, and you can choose the character and each part in the 「立ち絵」 (Character Art) section on the right. I set the character to ゆっくり霊夢 (Yukkuri Reimu) and chose 00.png for the eyes, mouth, and body. The other parts stay at 「未選択」 (Not selected).
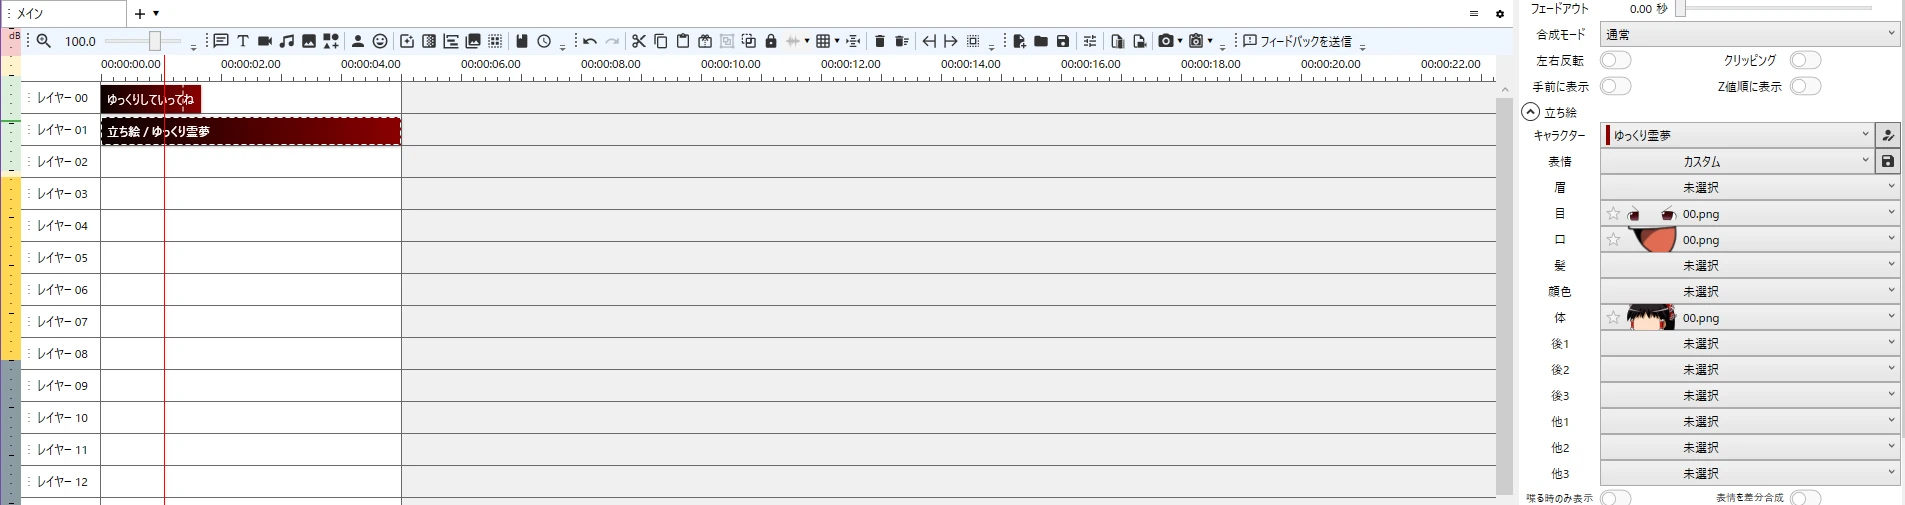
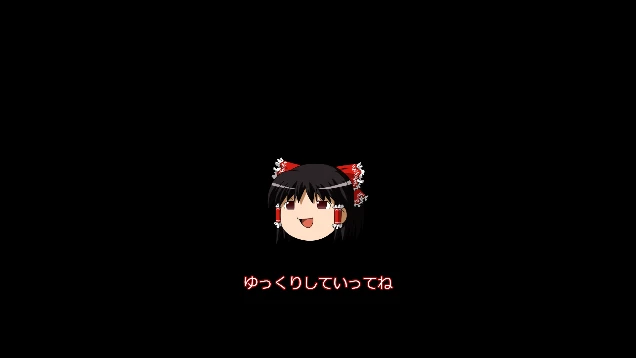
Now press play (the space bar or the play button). The character’s mouth moved in sync with the voice, and it blinked, too.
To change the expression, set it in the 「立ち絵」 (Character Art) section of the dialogue item, or add an expression item. For details, see the official guide How to use the character art feature (Japanese).
If the preview is sluggish when you use video items in YMM4, I’ve collected some fixes in another article, “I want to play YMM4 video items smoothly!” (Japanese).
Exporting the video
When your video is ready, choose 「ファイル」 (File) → 「動画出力」 (Export Video) from the menu to export it as a video file.
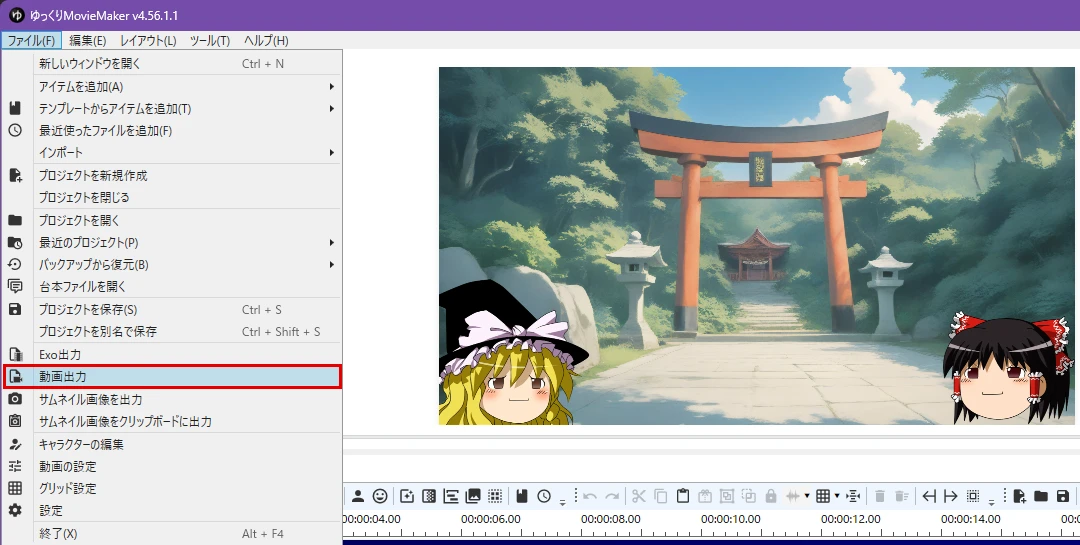
I kept the export settings at their defaults — export method 「FFmpeg出力」 (FFmpeg output), video bitrate 「自動」 (Auto), audio bitrate 192 kbps, and hardware encoding on — and clicked 「出力」 (Export) at the bottom right.
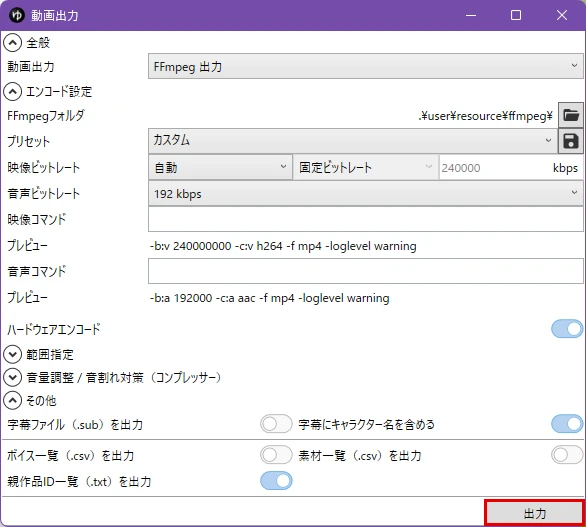
For a video of about 65 seconds, the export finished in roughly a minute (I didn’t time it). The result was a 1920×1080, 60 fps MP4.
However, the file was about 1.96 GB. With the video bitrate set to Auto, YMM4 exported at 240,000 kbps (240 Mbps), as shown in the export window. That’s fine if you’re only uploading to YouTube, but if you plan to share or archive the file, it’s better to lower the video bitrate before exporting.
The finished video
I uploaded the exported video to YouTube as an unlisted video. It includes a background image, both characters, and expression changes. (The dialogue is in Japanese.)
The script for this video, along with the placement of the dialogue, character art, and expressions, was put together by Claude (an AI). How to polish a video in YMM4 is beyond the scope of this article.
Summary
- To use YMM4, just extract the zip and run
YukkuriMovieMaker.exe - Choose YMM4 if you want the Yukkuri voice, or YMM4 Lite if you don’t. For commercial use, check the AquesTalk license
- Type a line, and YMM4 adds the voice, subtitles, and the character’s lip-sync for you
- Assets in the older “Kitsune format” need their folders and files renamed (in Japanese) to work as YMM4 animated character art
- Older versions needed AviUtl to export videos, but YMM4 now exports on its own
- There are plenty of plugins to add features. You can find them in the plugin list (Japanese) on the official site
- The layout and overall feel are the same as when I used it before. Any other differences will only show up with more hands-on use
📣 Ads from here on (Amazon Associates)
Here are a few things that make working in YMM4 more comfortable as you keep making videos.
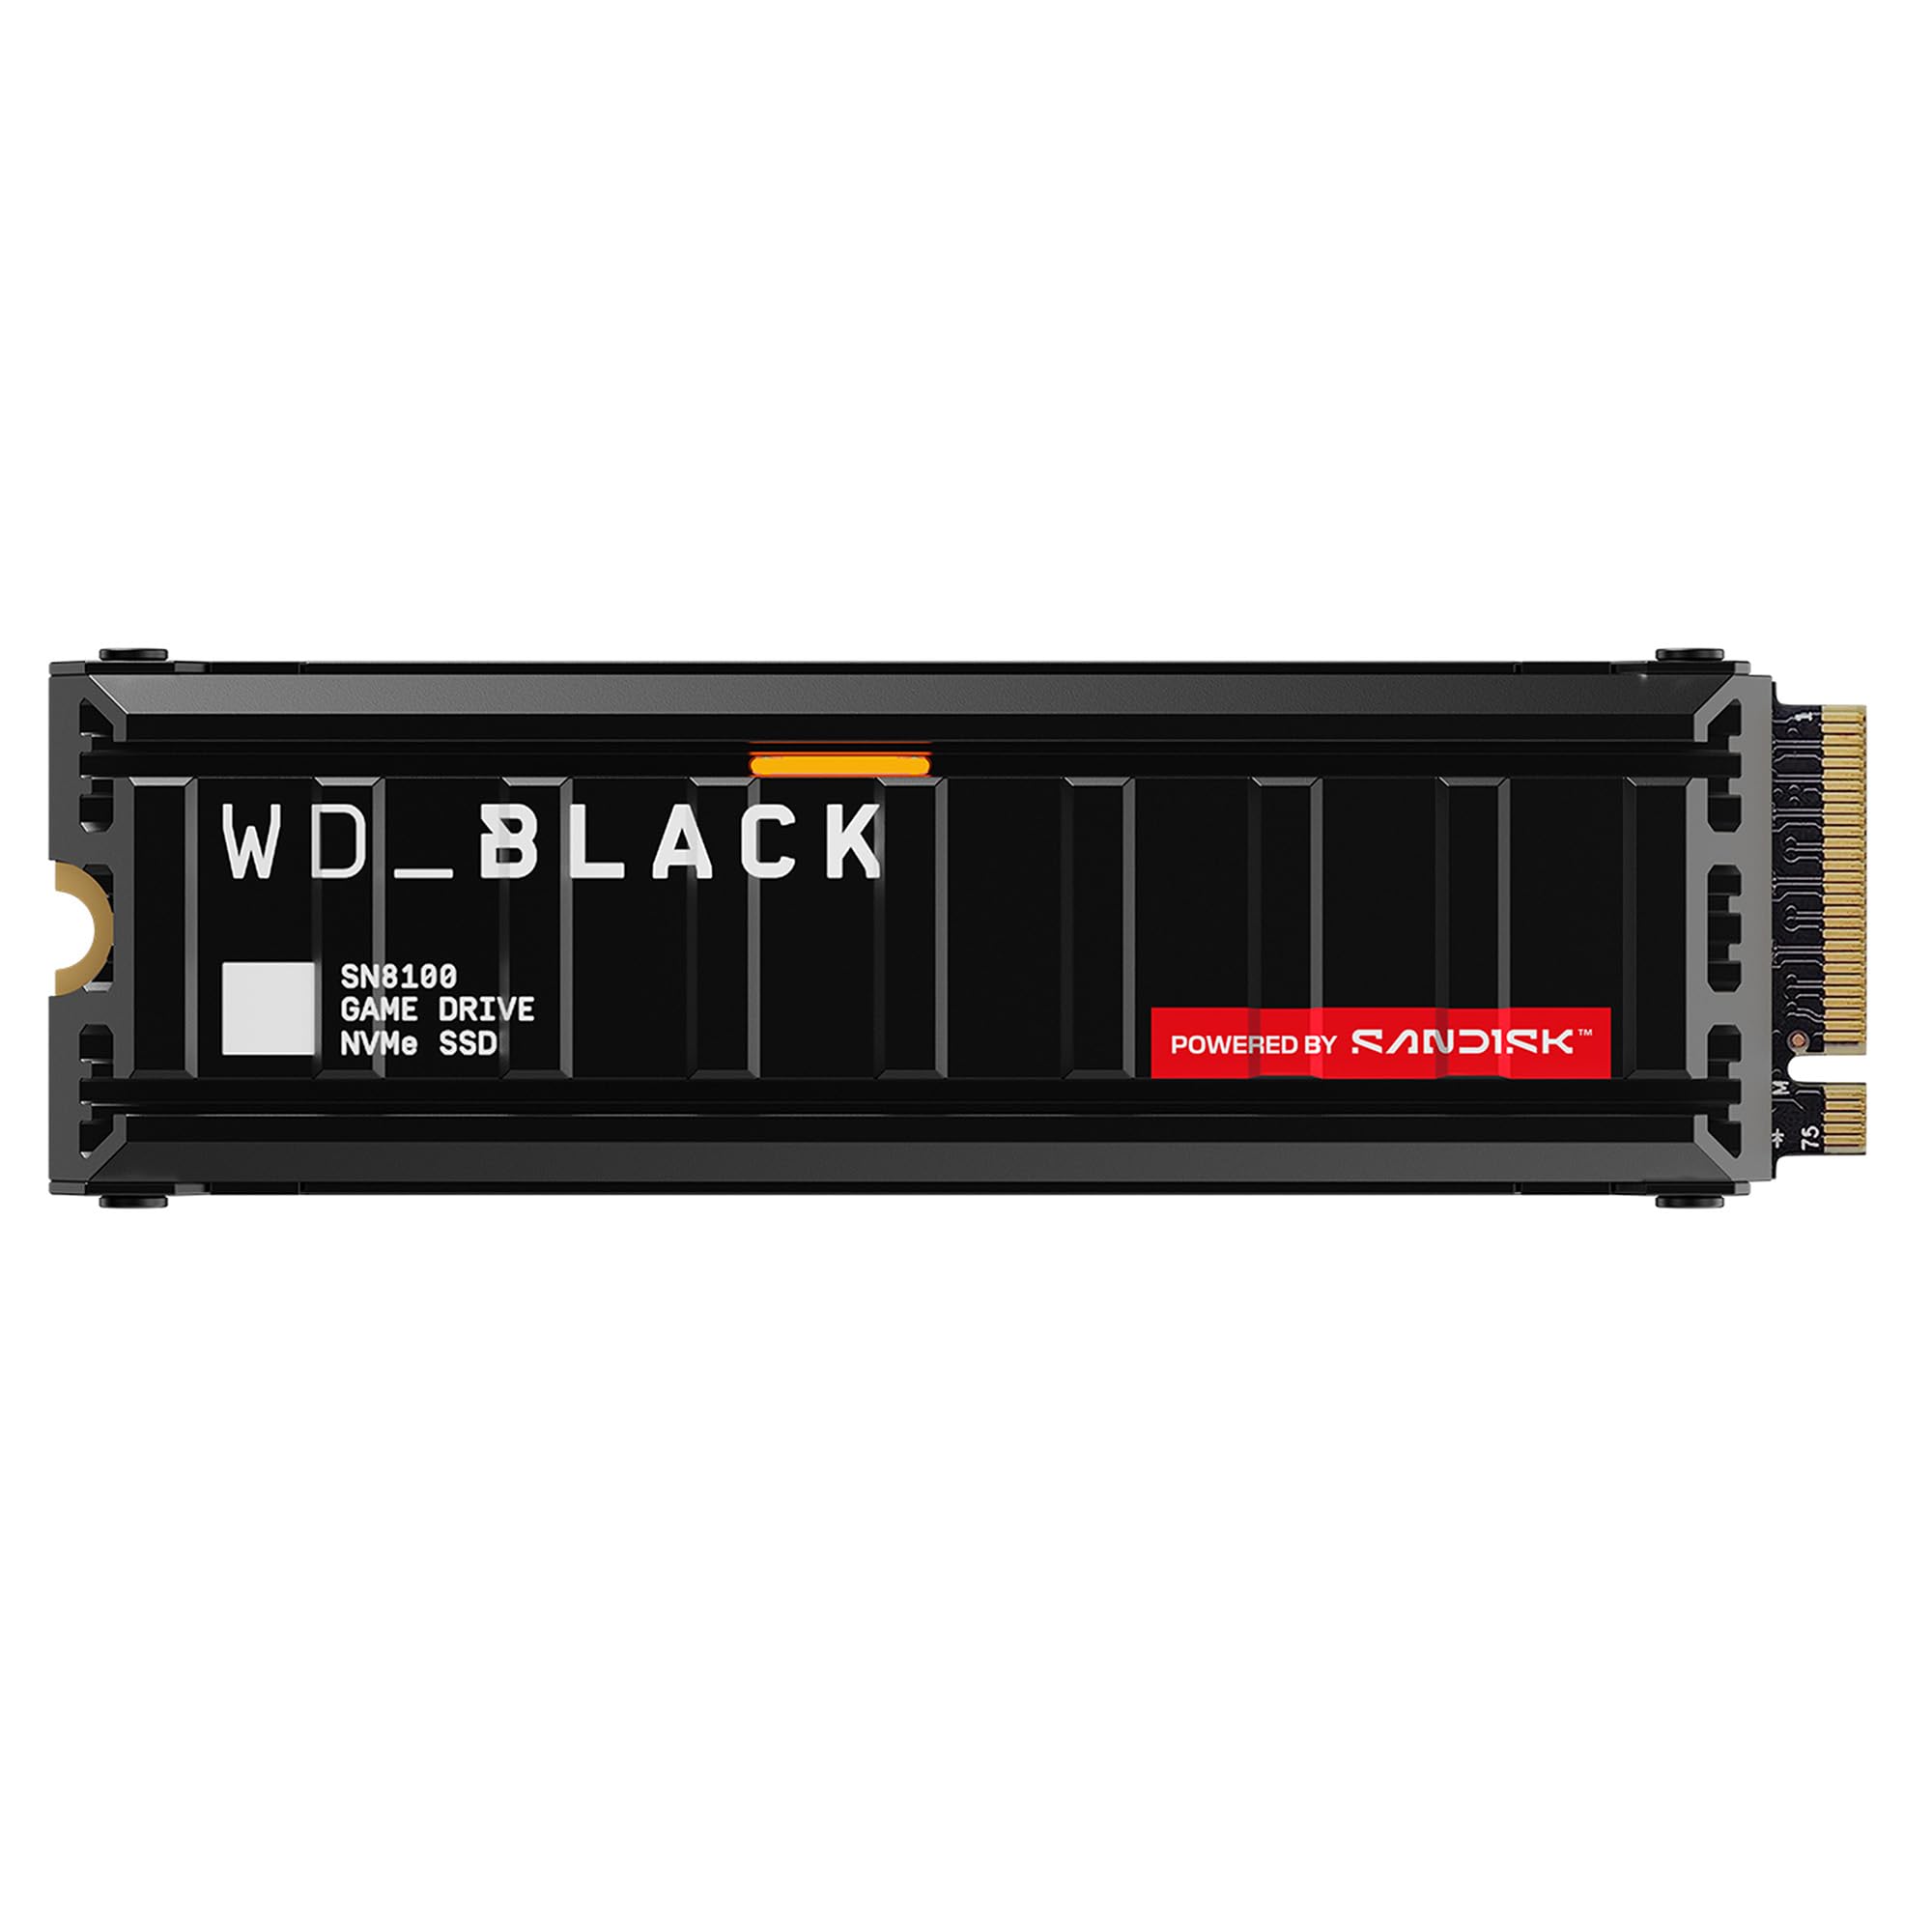
💾 WD_BLACK SN8100 2TB (PCIe 5.0 NVMe M.2 SSD with heatsink) An M.2 SSD that you install inside your PC. If you want smoother video editing, start by putting your character art, video assets, and exported videos on a fast SSD (to get its full speed, you need a motherboard that supports PCIe 5.0).

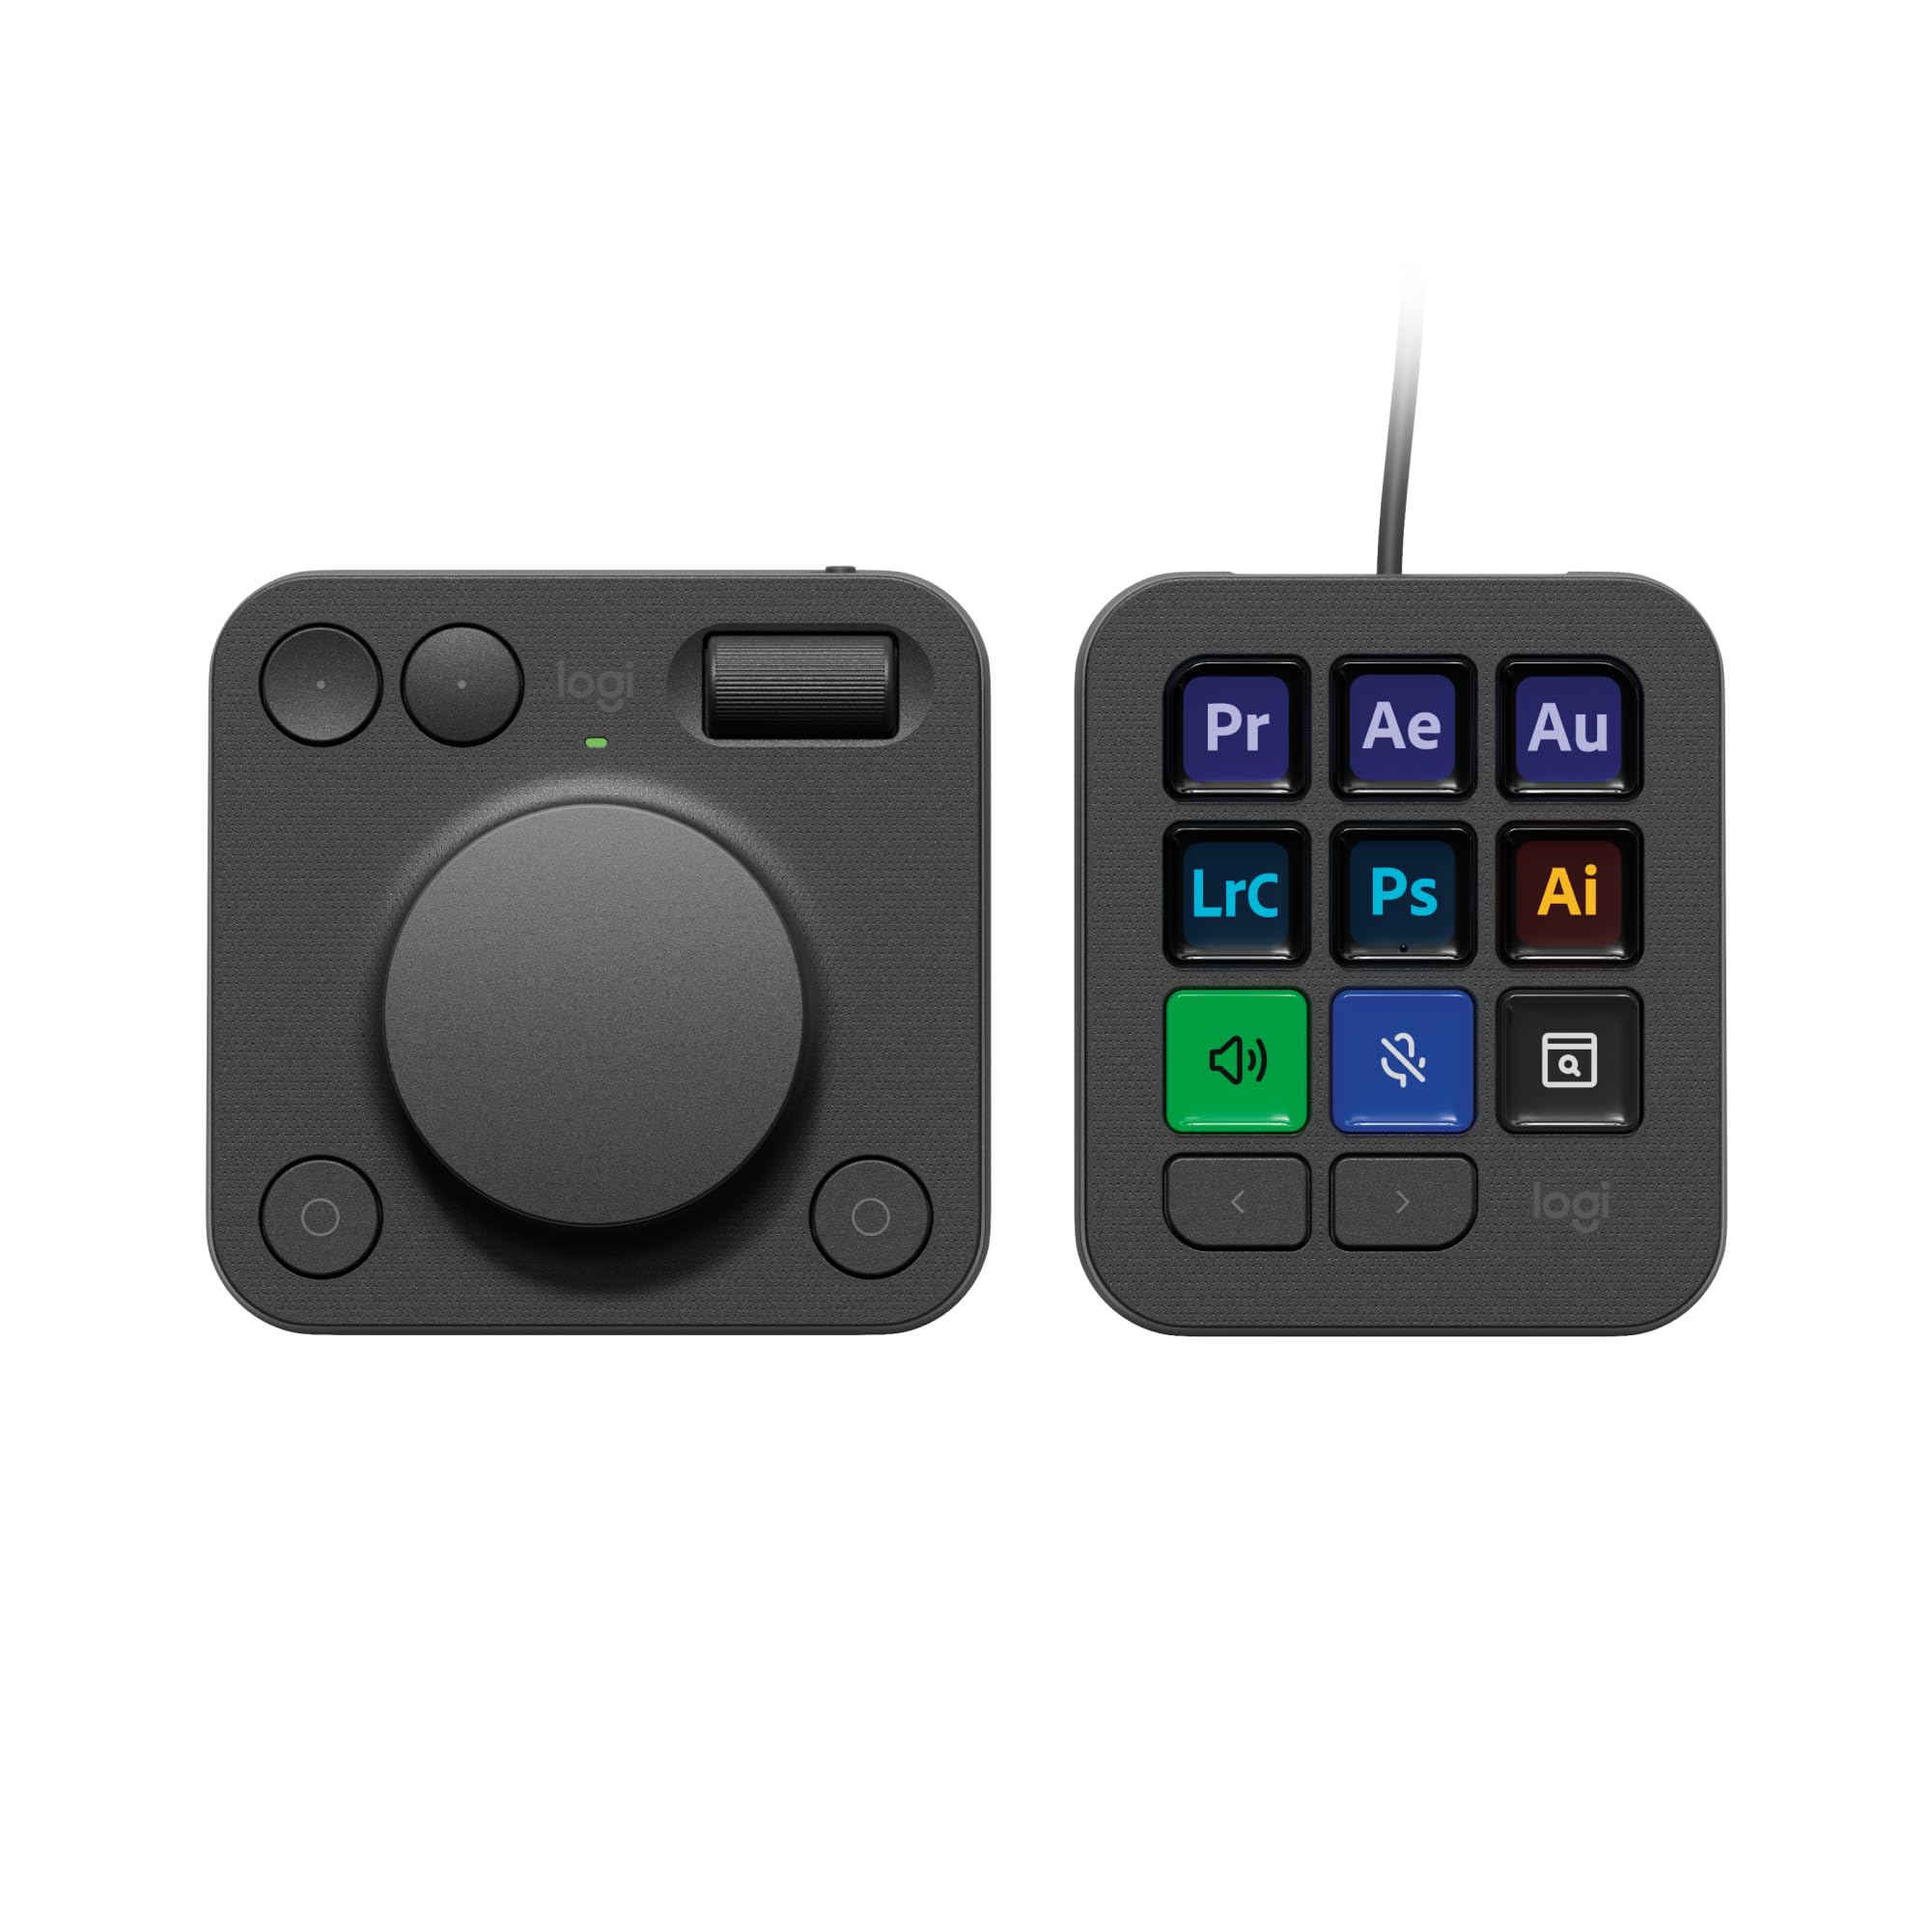
⌨️ Logitech MX Creative Console (left-hand device) A left-hand device with display keys that you can assign shortcuts to. Putting the actions you repeat in YMM4, like typing a line and playing it back to check, on keys at your fingertips speeds up your work.

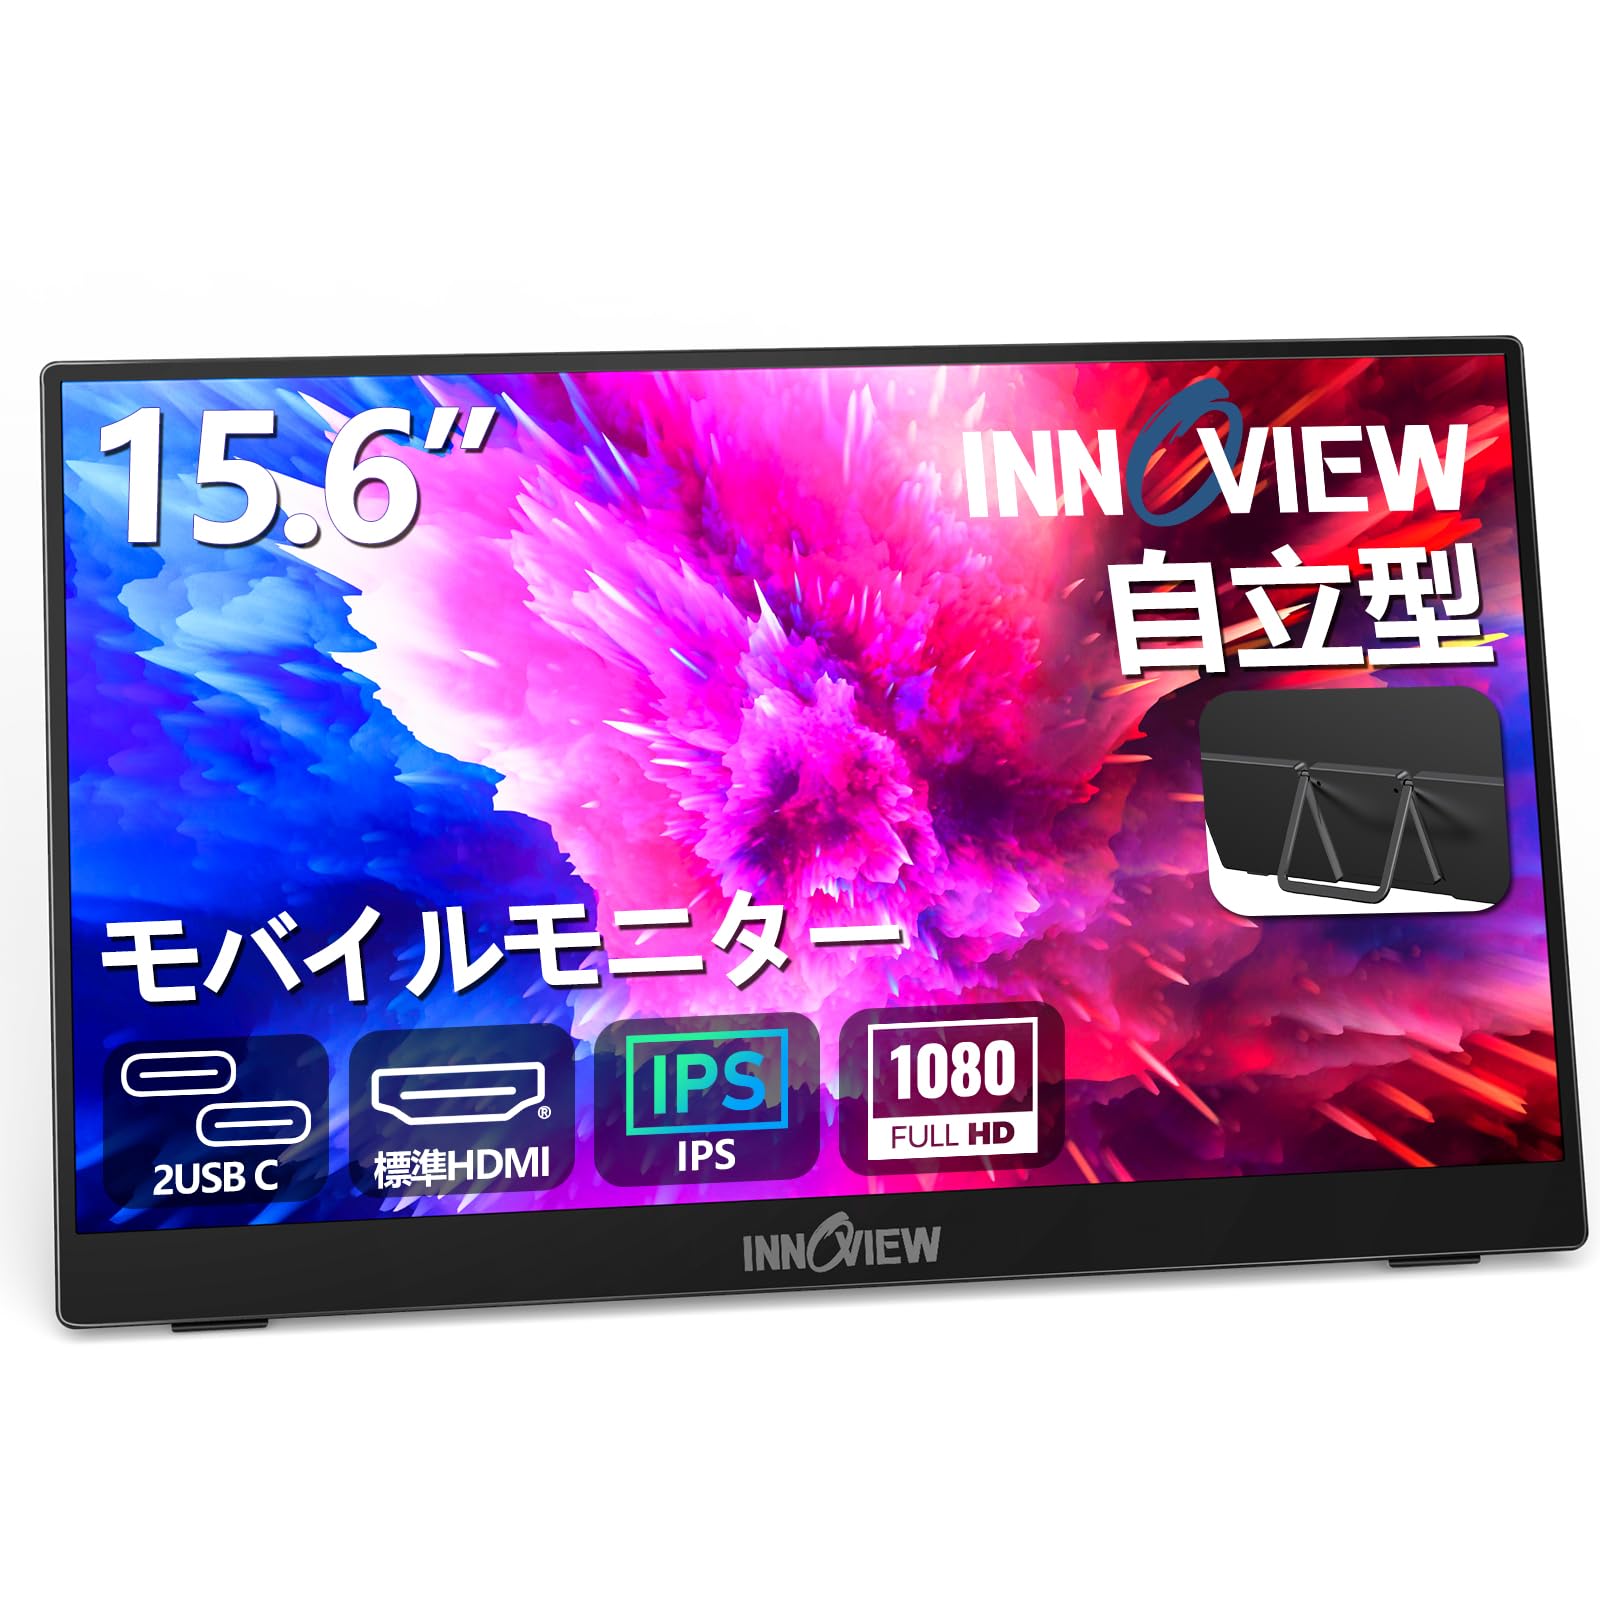
🖥️ InnoView 15.6-inch portable monitor (FHD, USB Type-C / HDMI) A 15.6-inch portable monitor that connects with a single USB Type-C cable or HDMI. YMM4 shows the timeline, preview, and item settings all at once, so you can add it beside your screen just while editing to get more room.

If you buy through these links, I get a small referral fee, at no extra cost to you. Any fees I receive go gratefully toward my AI subscriptions. If anything catches your eye, take a look!
*As an Amazon Associate, ushiblo earns from qualifying purchases.